Introduction
This lab provides instructions for developing applications using Amazon Simple Queue Service and Amazon Simple Notification Service.
Amazon Simple Queue Service (SQS)
Amazon SQS provides queues for high-throughput, system-to-system messaging. Queues can be used to decouple heavyweight processes and to buffer and batch work. Amazon SQS stores messages until an application process them.
Navigate to the Amazon SQS Console
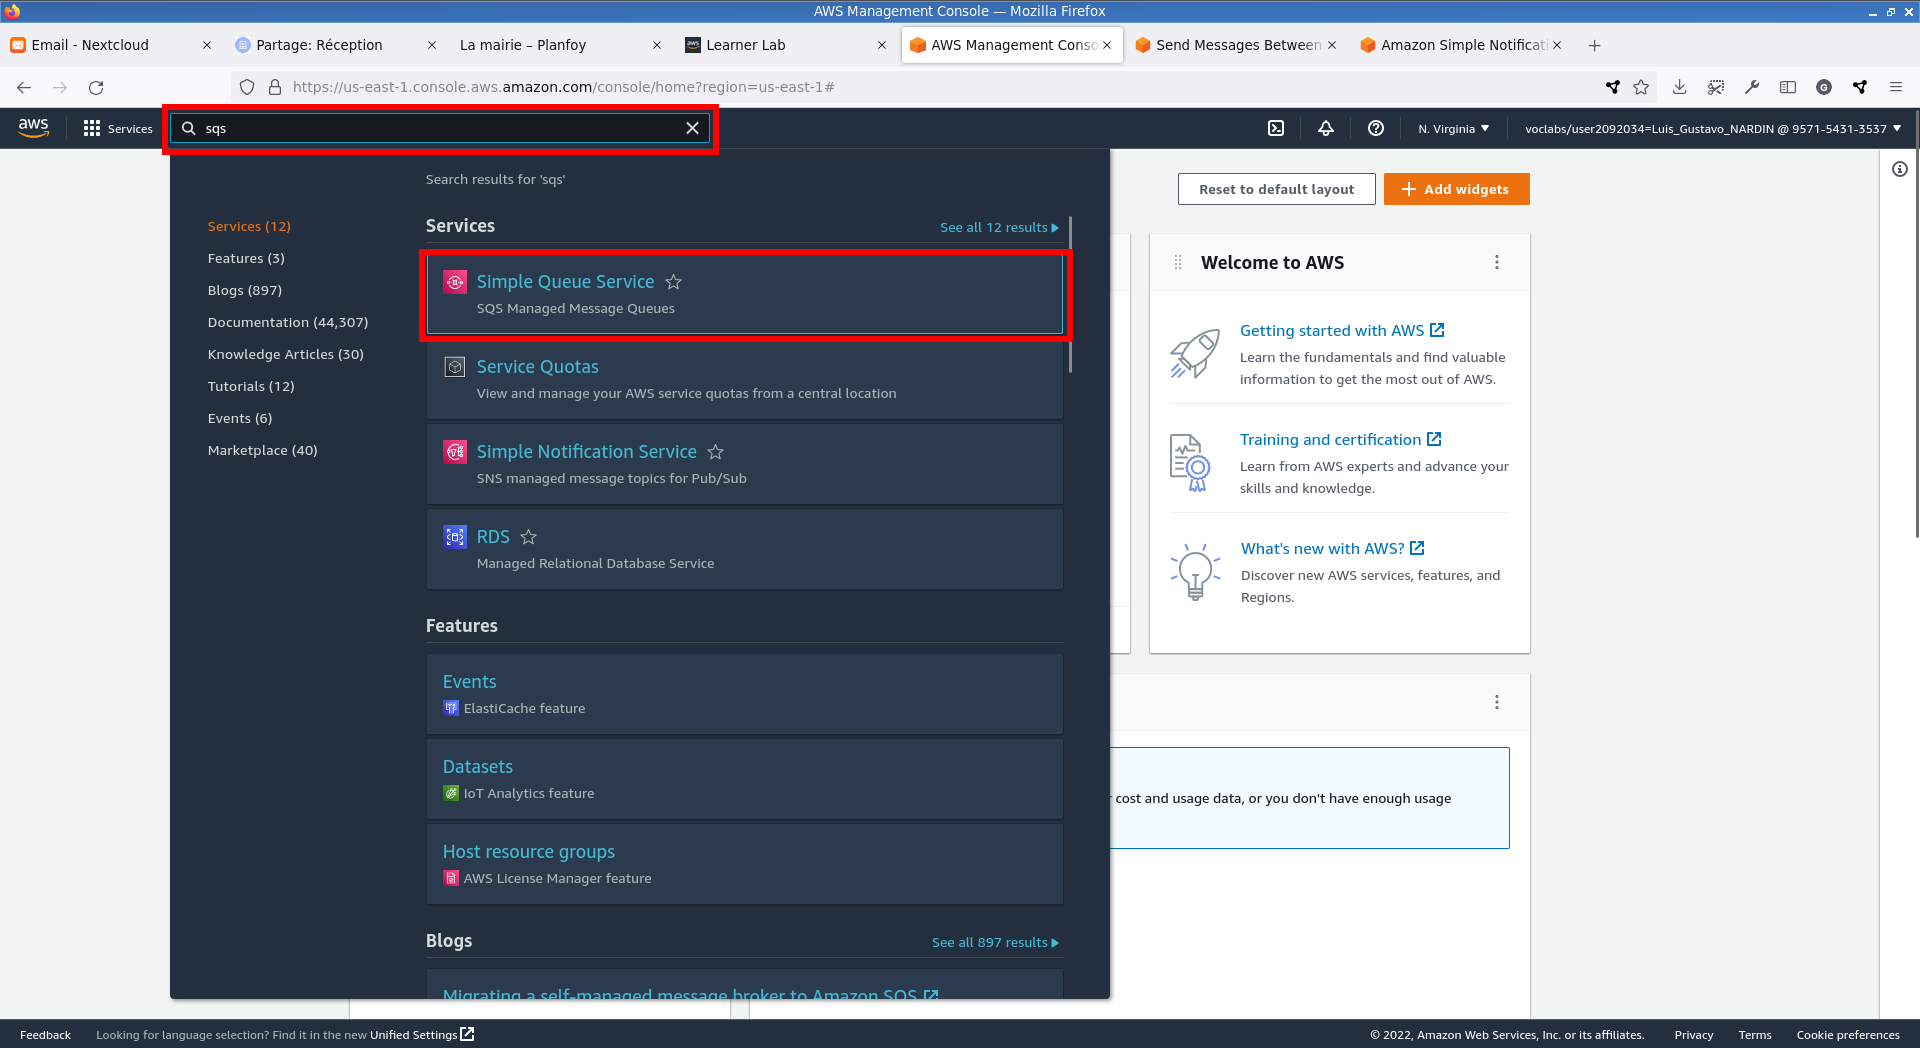
In the top navigation bar of the AWS Management Console, search for sqs and open the Simple Queue Service Console.
Create a Queue
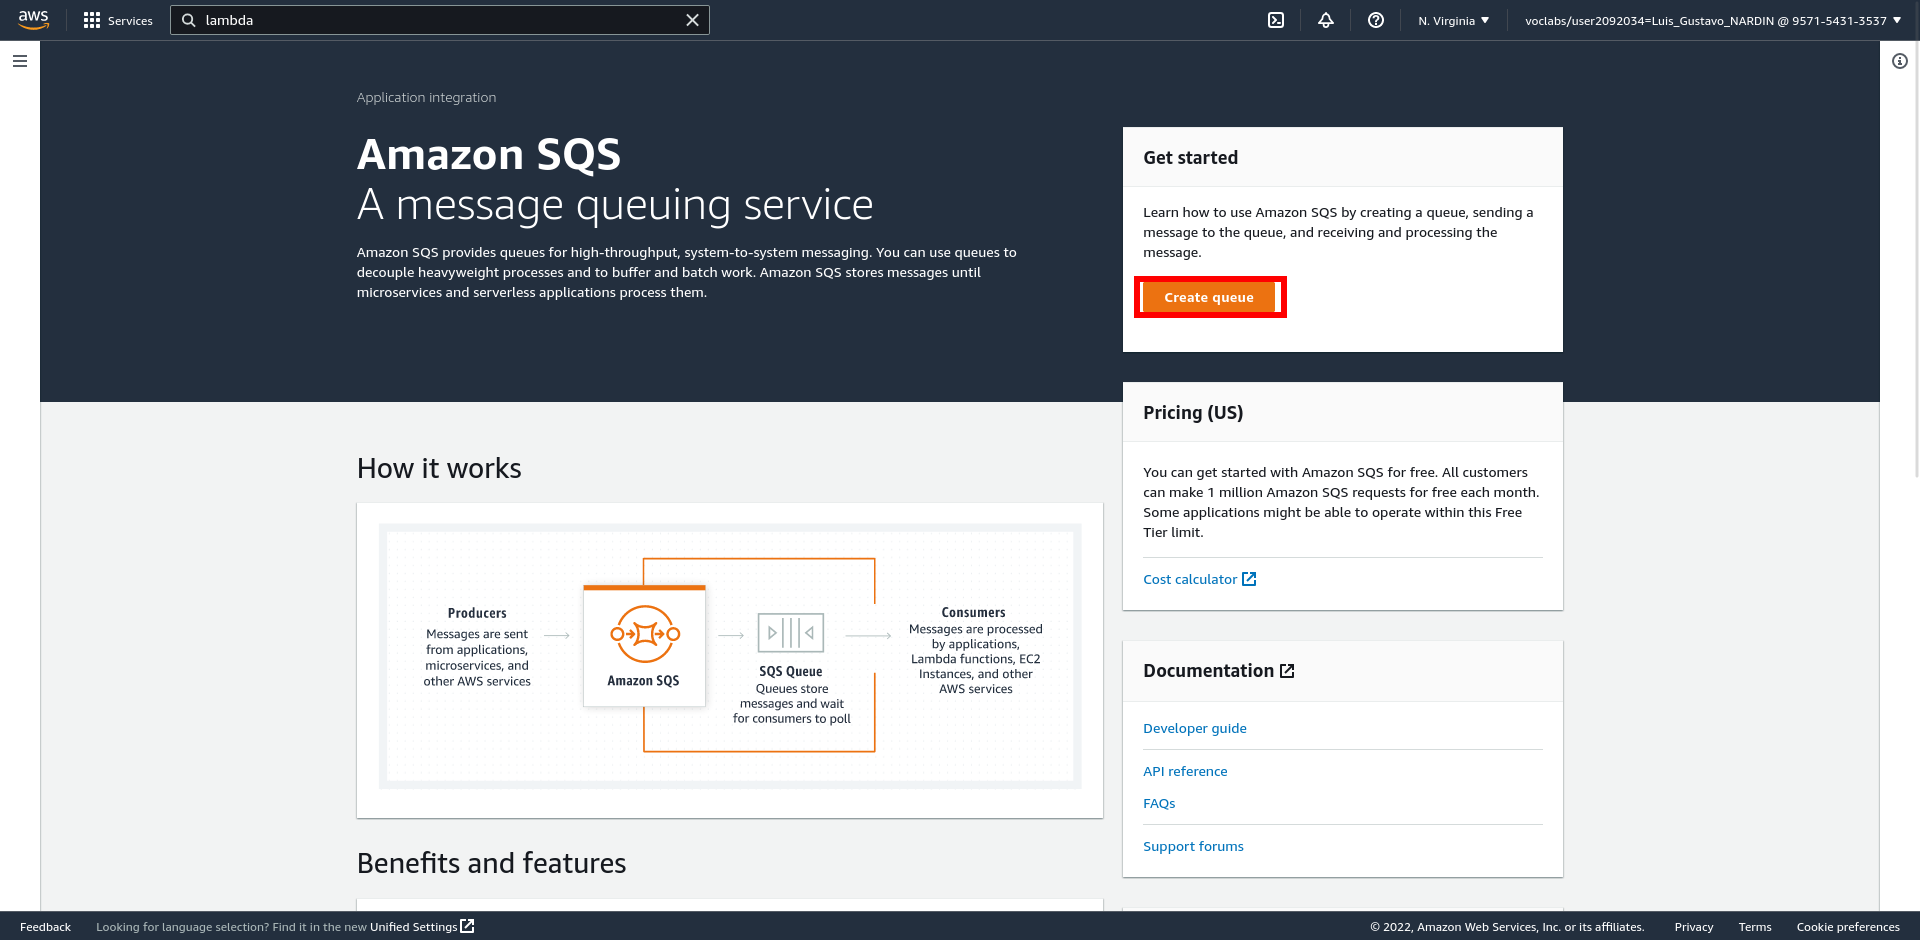
In the Amazon SQS Console, choose Create queue.
Configuration Queue
-
In the Details panel
-
Type: Standard (a) What are the available types of Queues? (b) What are their differences?
-
Name: messaging-app-queue
-
-
In the Configuration panel
-
Visibility timeout: 30 Seconds
-
Message retention period: 1 Hours
-
Delivery delay: 0 Seconds
-
Maximum message size: 256 KB
-
Receive message wait time: 0 Seconds
-
-
In the Encryption panel
-
Server-side encryption: Enabled
-
Encryption key type: Amazon SQS key (SSE-SQS)
-
-
In the Access policy panel
-
Choose method: Basic
-
Define who can send messages to the queue: Only the queue owner
-
Define who can receive messages from the queue: Only the queue owner
-
-
Select the Create queue button
Now you have a message queue available to receive messages.
Sending a Message to the Queue
You can use the AWS SDK for Java to write an application to send a message to the queue.
|
Note
|
It is assumed that you already have an AWS Java project set up. If not, refer to Create AWS Java Project. |
You will create a Java class that sends a message to the Amazon SQS queue messaging-app-queue including the information about a file (i.e., bucket and file names) to be processed by another application.
|
Note
|
Create this file under the src/main/java/fr/emse/sqs folder
|
package fr.emse.sqs;

import software.amazon.awssdk.regions.Region;
import software.amazon.awssdk.services.sqs.SqsClient;
import software.amazon.awssdk.services.sqs.model.SendMessageRequest;
import software.amazon.awssdk.services.sqs.model.SendMessageResponse;

public class SendMessage {

  public static void main(String[] args) {
    Region region = Region.US_EAST_1;

    if (args.length < 3) {
      System.out.println("Missing the Queue URL, Bucket Name, or File Name arguments");
      System.exit(1);
    }

    String queueURL = args[0];
    String bucketName = args[1];
    String fileName = args[2];

    SqsClient sqsClient = SqsClient.builder().region(region).build();

    SendMessageRequest sendRequest = SendMessageRequest.builder().queueUrl(queueURL)
        .messageBody(bucketName + ";" + fileName).build();

    SendMessageResponse sqsResponse = sqsClient.sendMessage(sendRequest);

    System.out.println(
        sqsResponse.messageId() + " Message sent. Status is " + sqsResponse.sdkHttpResponse().statusCode());
  }
}
Run the code to send the message to the messaging-app-queue queue.
|
Important
|
You need to pass three arguments to run the code below: (1) the Queue URL that you can retrieve in the Amazon SQS console, (2) the bucket name that you can retrieve in the Amazon S3 console, and (3) the name of the file that is given values.csv.
|
To check to see if the message entered the queue. Navigate to the Amazon SQS console, and inspect the Messages available column to see if the value is 1. If so, this indicates a message was added to the queue.
|
Note
|
This number may be greater than 1 in case you ran the code multiple times. |
Task 1: Retrieve Message
Now that you have created a queue and sent a message, you have to retrieve the message for processing.
You have to develop a Java program that
-
retrieve 1 message from the queue
-
retrieve the bucket and file names from the message
-
download the file from the Amazon S3
|
Note
|
Make sure the values.csv file is in the bucket to guarantee that your code will work correctly. |
Navigate to the Amazon SQS console, and inspect the Messages available column. (c) Is the number of Messages Available different than before retrieving the message? (d) Why?
You have to explicitly delete the message from the queue. Thus,extend the Java code to delete the message in the queue after successfully downloading the file.
Amazon Simple Notification Service (SNS)
Amazon SQS provides queues for high-throughput, system-to-system messaging. Queues can be used to decouple heavyweight processes and to buffer and batch work. Amazon SQS stores messages until an application process them.
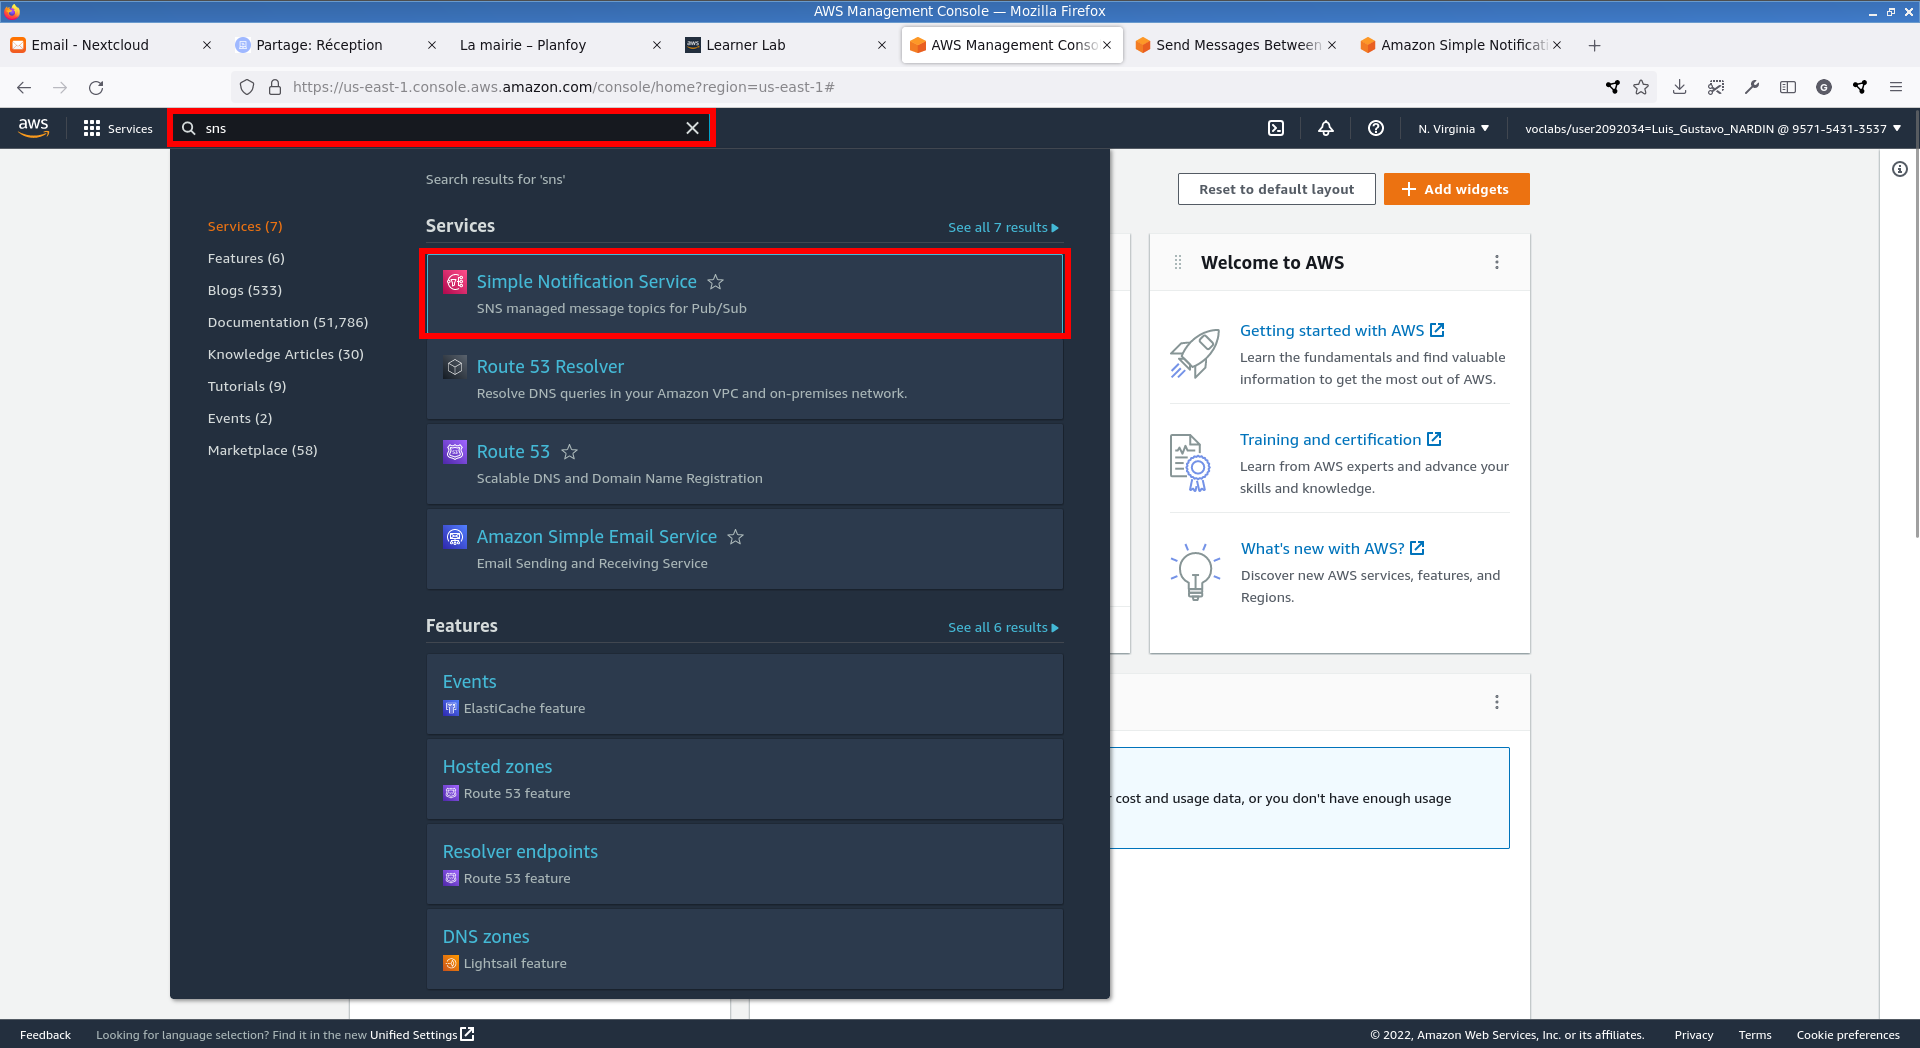
Navigate to the Amazon SNS Console
Amazon Simple Notification Service (Amazon SNS) is a fully managed messaging service for both application-to-application (A2A) and application-to-person (A2P) communication.
The A2A pub/sub functionality provides topics for high-throughput, push-based, many-to-many messaging between distributed systems, microservices, and event-driven serverless applications. Using Amazon SNS topics, your publisher systems can fanout messages to a large number of subscriber systems, including Amazon SQS queues, AWS Lambda functions, HTTPS endpoints, and Amazon Kinesis Data Firehose, for parallel processing. The A2P functionality enables you to send messages to users at scale via SMS, mobile push, and email.
Create a Queue
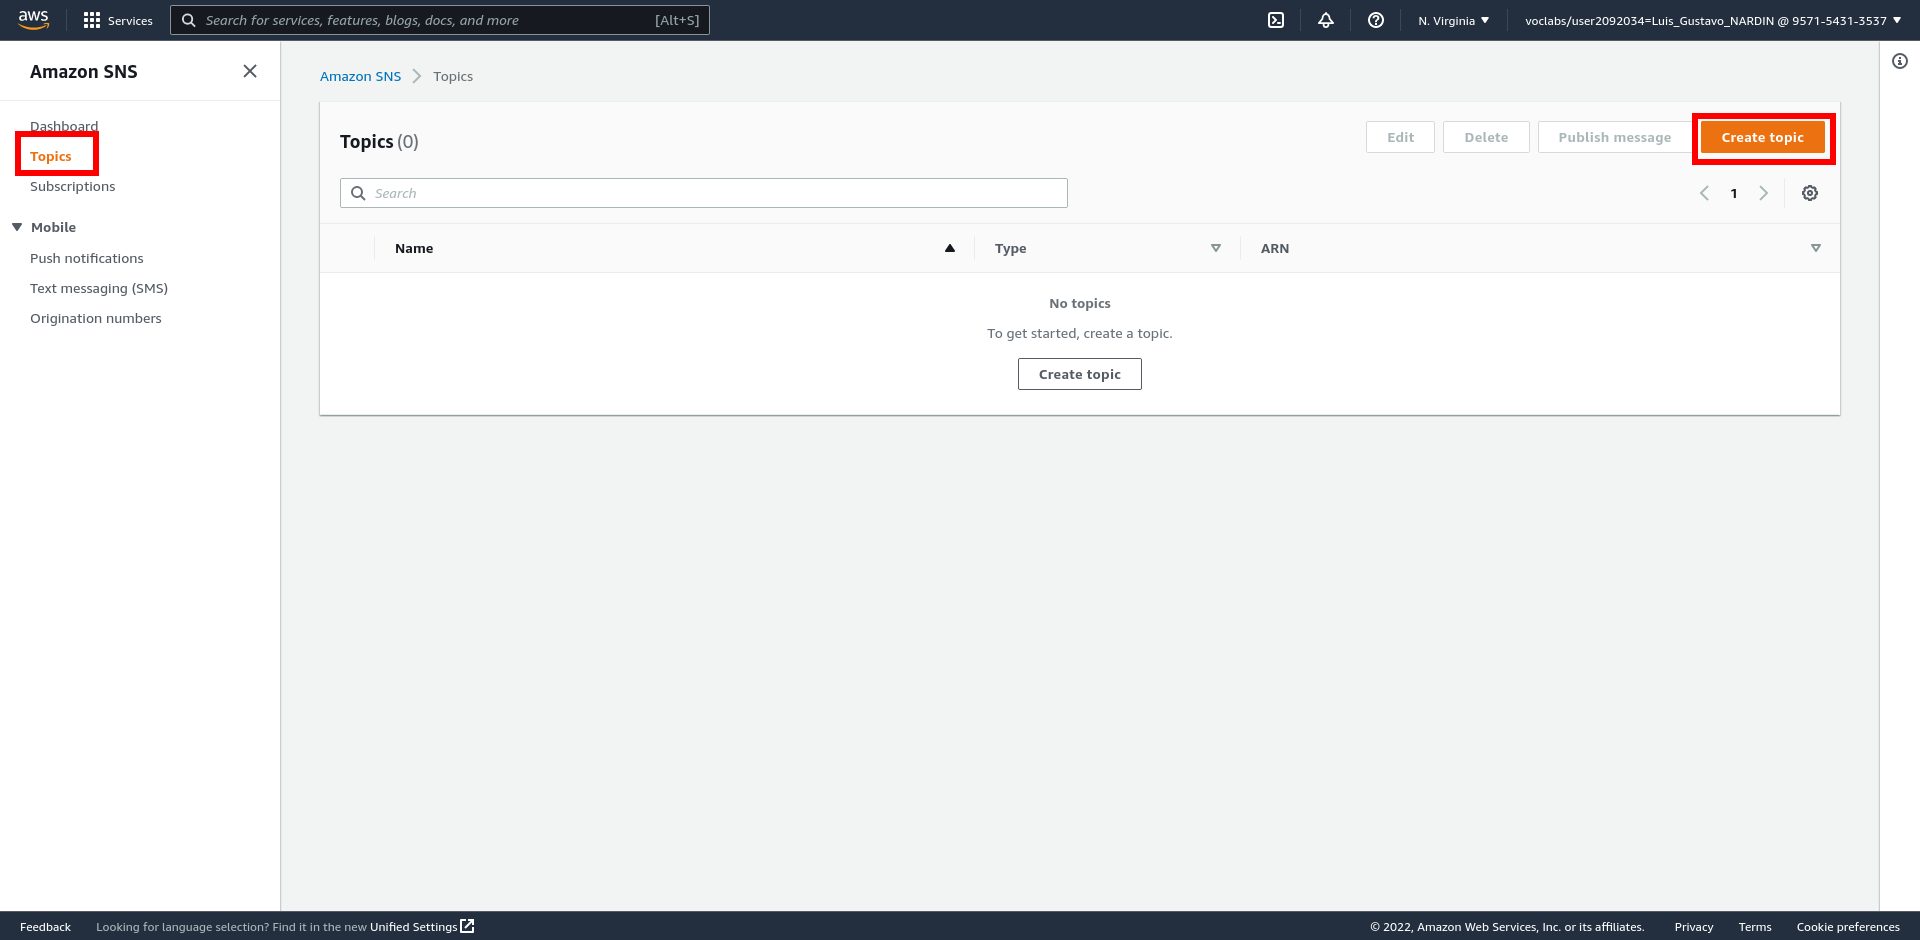
In the Amazon SNS Console, select Topics in the left panel and choose Create topic.
Configuration Topic
-
In the Details panel
-
Type: Standard (e) What are the available types of Topics? (f) What are their differences?
-
Name: MyFirstTopic
-
-
In the Data protection policy panel
-
Configuration mode: Basic
-
-
In the Encryption panel
-
Encryption: Disabled
-
-
In the Access policy panel
-
Choose method: Basic
-
Define who can send messages to the topic: Only the topic owner
-
Define who can receive messages from the topic: Only the topic owner
-
-
In the Delivery retry policy (HTTP/S) panel
-
Check the Use the default delivery retry policy box
-
-
Select the Create topic button
Now you have a topic available to subscribe and publish messages.
Publish a Message to the Topic
You can use the AWS SDK for Java to write an application to publish a message to the topic.
|
Note
|
It is assumed that you already have an AWS Java project set up. If not, refer to Create AWS Java Project. |
You will create a Java class that sends a message to the Amazon SNS topic MyFirstTopic including the information about a file (i.e., bucket and file names) to be processed by another application.
|
Note
|
Create this file under the src/main/java/fr/emse/sns folder
|
package fr.emse.sns;

import software.amazon.awssdk.regions.Region;
import software.amazon.awssdk.services.sns.SnsClient;
import software.amazon.awssdk.services.sns.model.PublishRequest;
import software.amazon.awssdk.services.sns.model.PublishResponse;
import software.amazon.awssdk.services.sns.model.SnsException;

public class PublishTopic {

  public static void main(String[] args) {
    Region region = Region.US_EAST_1;

    if (args.length < 3) {
      System.out.println("Missing the Topic ARN, Bucket Name, or File Name arguments");
      System.exit(1);
    }

    String topicARN = args[0];
    String bucketName = args[1];
    String fileName = args[2];

    try {
      SnsClient snsClient = SnsClient.builder().region(region).build();

      PublishRequest request = PublishRequest.builder().message(bucketName + ";" + fileName).topicArn(topicARN)
          .build();

      PublishResponse snsResponse = snsClient.publish(request);
      System.out.println(
          snsResponse.messageId() + " Message sent. Status is " + snsResponse.sdkHttpResponse().statusCode());

    } catch (SnsException e) {
      System.err.println(e.awsErrorDetails().errorMessage());
      System.exit(1);
    }
  }
}|
Important
|
You need to pass three arguments to run the code below: (1) the Topic ARN that you can retrieve in the Amazon SNS console, (2) the bucket name that you can retrieve in the Amazon S3 console, and (3) the name of the file that is given values.csv.
|
Subscribe AWS Lambda
Now that you have created a topic, you have to subscribe an application to process published messages. The subscription endpoint supports the protocol
-
http protocol, the (public) endpoint is a URL beginning with http://
-
https protocol, the (public) endpoint is a URL beginning with https://
-
email protocol, the endpoint is an email address
-
email-json protocol, the endpoint is an email address
-
sms protocol, the endpoint is a phone number of an SMS-enabled device
-
sqs protocol, the endpoint is the ARN of an Amazon SQS queue
-
application protocol, the endpoint is the EndpointArn of a mobile app and device
-
lambda protocol, the endpoint is the ARN of an Lambda function
-
firehose protocol, the endpoint is the ARN of an Amazon Kinesis Data Firehose delivery stream
This tutorial provides instructions of how to subscribe an AWS Lambda function and how to handle the message in the function.
It is required to create a new AWS Lambda (see TD 3 - Cloud Computing : AWS Lambda - AWS Lambda with Java).
-
Create an AWS Lambda function called
myLambdaFunction -
Navigate into the AWS Lambda function, select Add Trigger
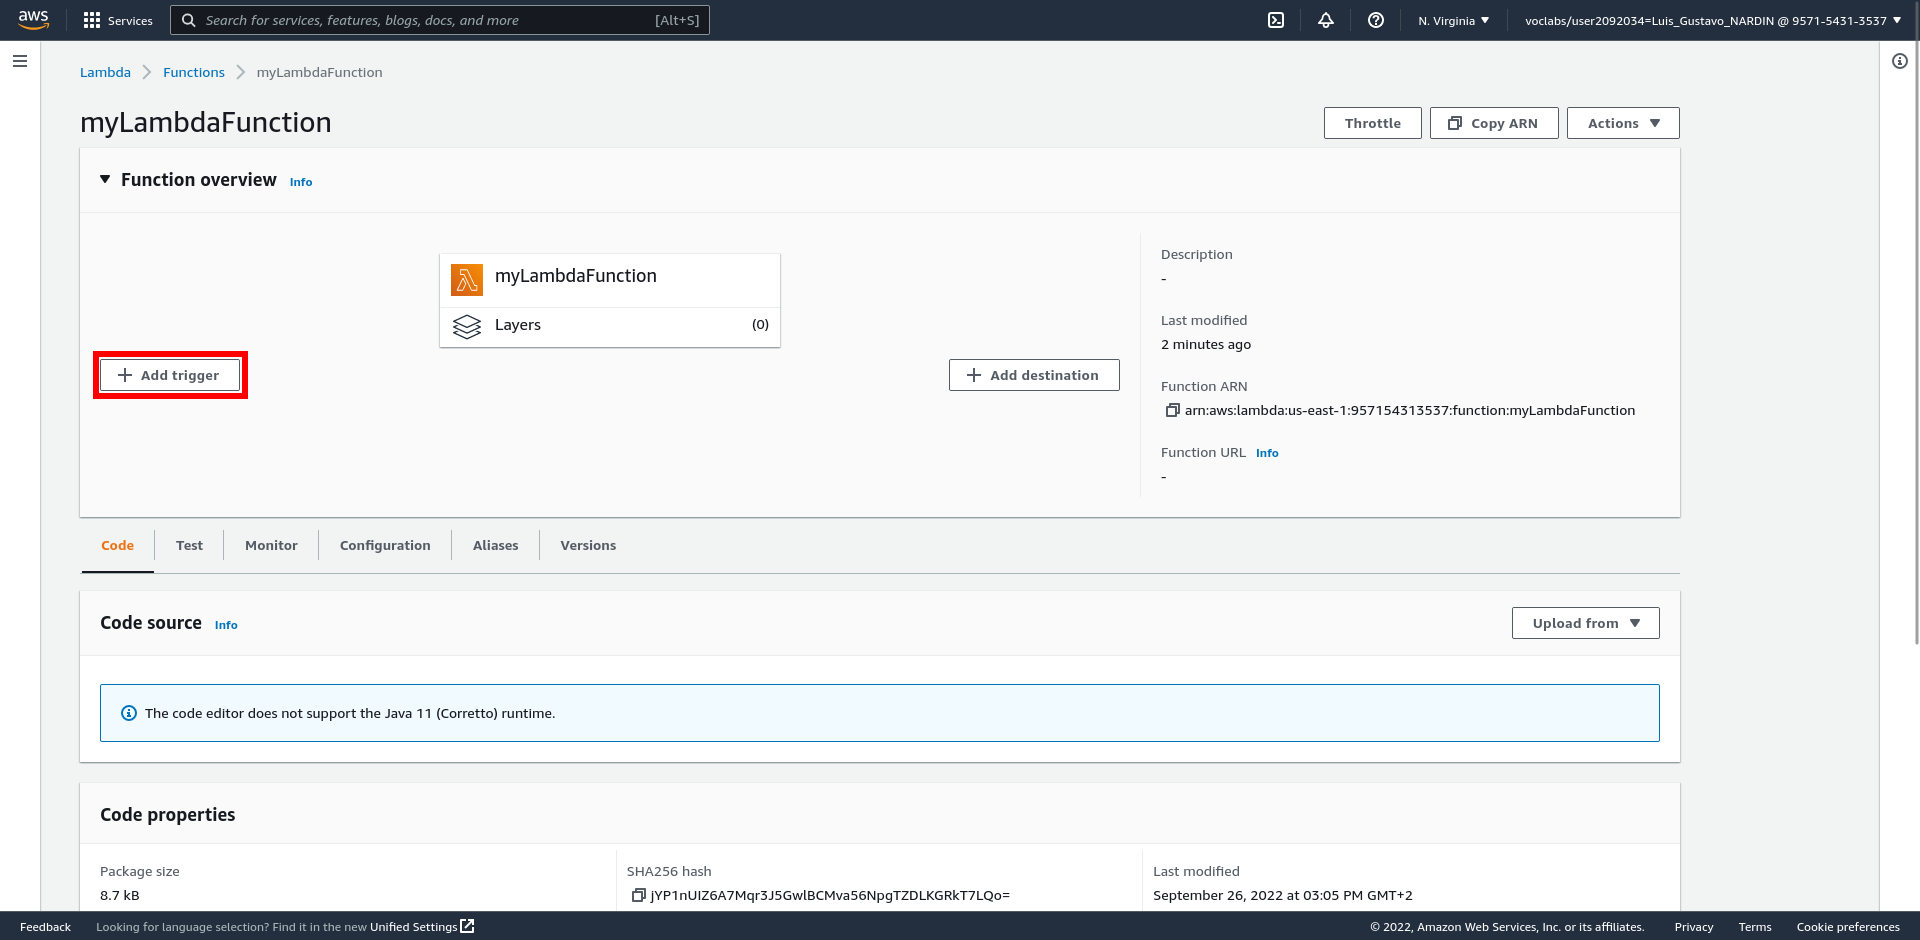
-
Choose SNS as source
-
Choose the myFirstTopic as SNS topic
-
Select Add button
Handle Message
Now you need to write a Java code to associate with the AWS Lambda.
|
Note
|
It is assumed that you already have an AWS Java project set up. If not, refer to Create AWS Java Project. |
This code will depend on aws-lambda-java-core and aws-lambda-java-events packages. Thus, confirm that you have the entries in the POM file.
  <dependency>
    <groupId>com.amazonaws</groupId>
    <artifactId>aws-lambda-java-core</artifactId>
    <version>1.2.3</version>
  </dependency>
  <dependency>
    <groupId>com.amazonaws</groupId>
    <artifactId>aws-lambda-java-events</artifactId>
    <version>3.11.3</version>
  </dependency>
  <dependency>
    <groupId>com.amazonaws</groupId>
    <artifactId>aws-java-sdk-s3</artifactId>
  </dependency>
You will then create a Java class that handles a message from the Amazon SNS topic MyFirstTopic.
|
Note
|
Create this file under the src/main/java/fr/emse/sns folder
|
package fr.emse.sns;

import java.text.SimpleDateFormat;
import java.util.Calendar;

import com.amazonaws.services.lambda.runtime.Context;
import com.amazonaws.services.lambda.runtime.RequestHandler;
import com.amazonaws.services.lambda.runtime.events.SNSEvent;

public class HandleSNSEvent implements RequestHandler<SNSEvent, Object> {

  public Object handleRequest(SNSEvent request, Context context) {

    String timeStamp = new SimpleDateFormat("yyyy-MM-dd_HH:mm:ss").format(Calendar.getInstance().getTime());
    context.getLogger().log("Invocation started: " + timeStamp);
    context.getLogger().log(request.getRecords().get(0).getSNS().getMessage());

    timeStamp = new SimpleDateFormat("yyyy-MM-dd_HH:mm:ss").format(Calendar.getInstance().getTime());
    context.getLogger().log("Invocation completed: " + timeStamp);
    return null;
  }
}
Next, you need to package the code
mvn packageand deploy the package in the AWS Lambda function changing the handler to fr.emse.sns.HandleSNSEvent::handleRequest (see TD 3 - Cloud Computing : AWS Lambda - Deploy Package).
Test Integration
-
Run the PublicTopic code to publish a message in the topic
-
Navigate to the myLambdaFunction and select the Monitor tab
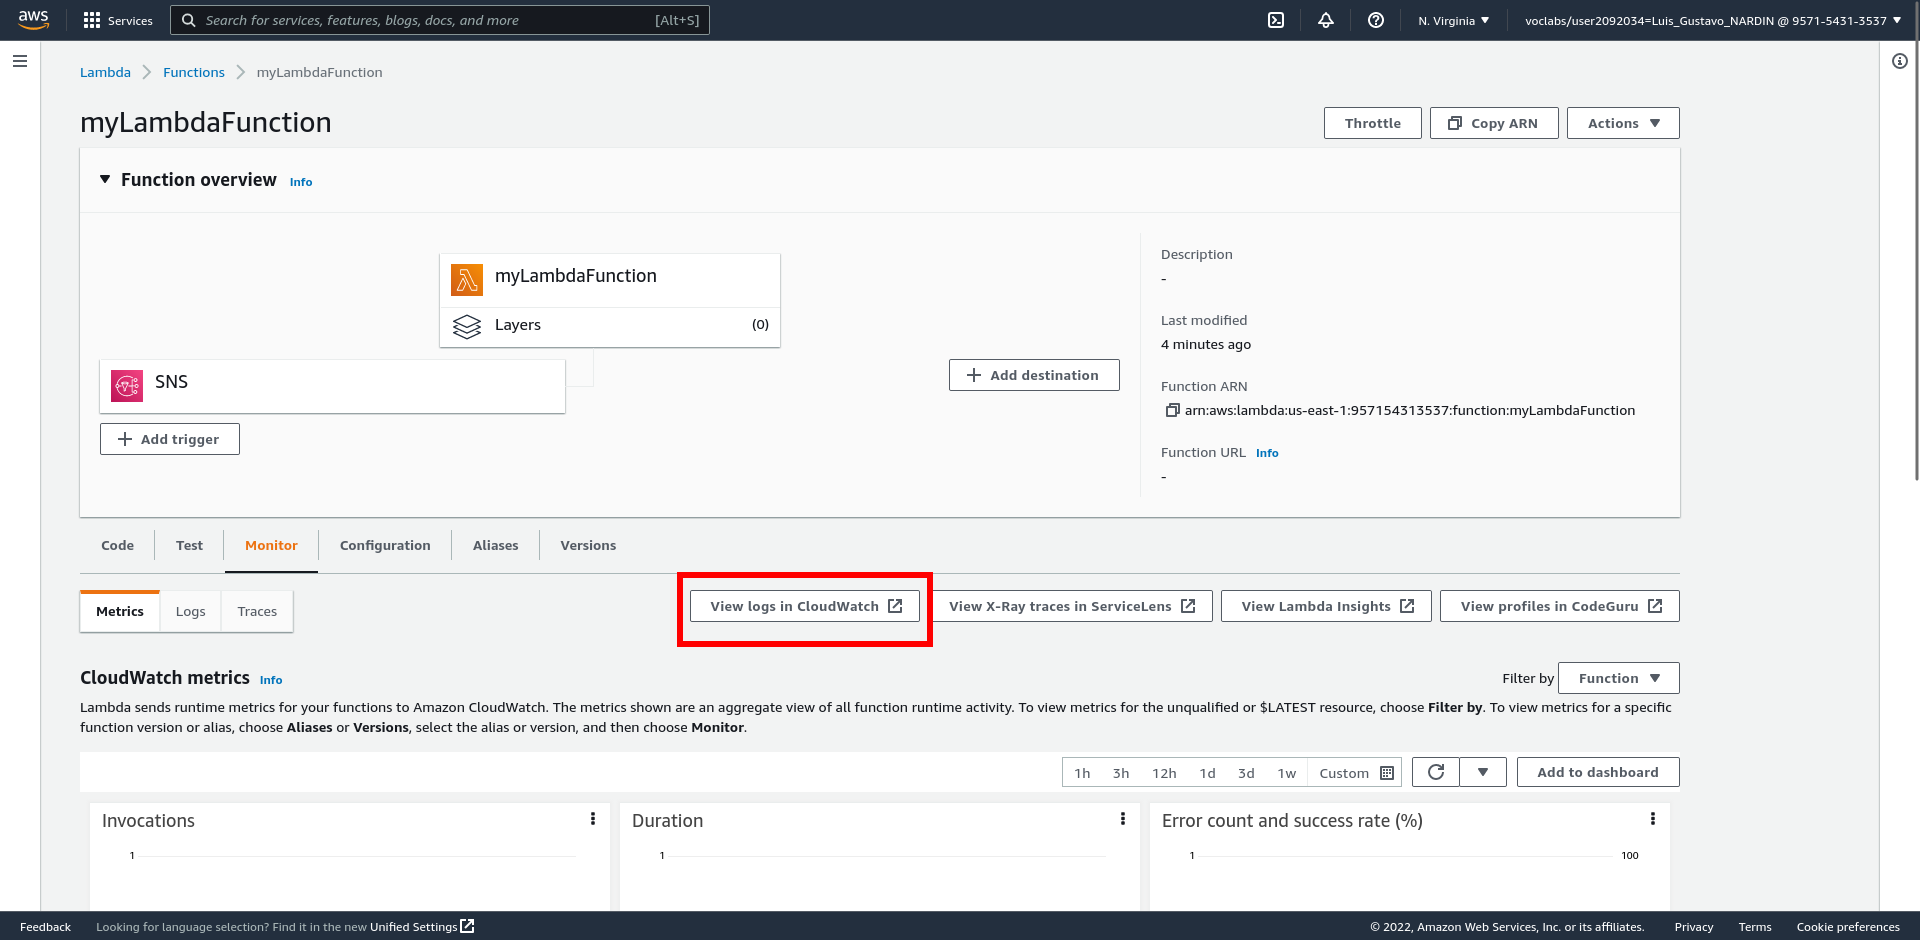
-
Select the View logs in CloudWatch button
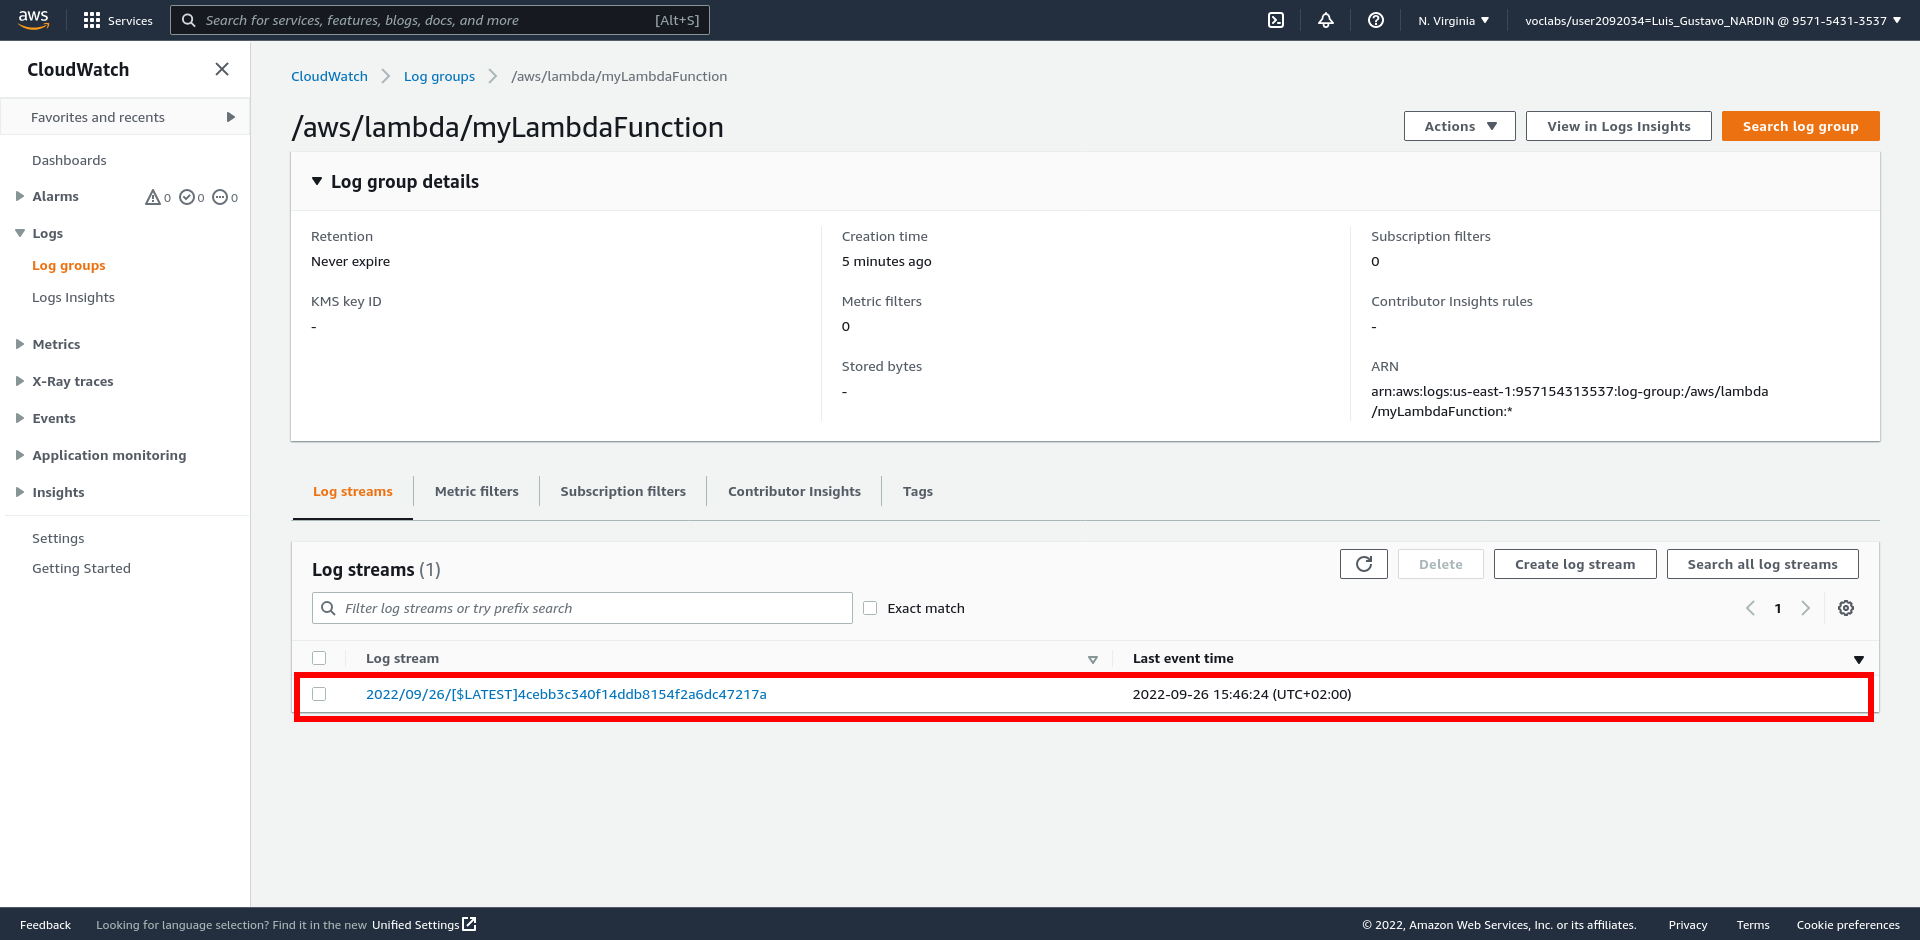
-
Select the most recent entry in the Log stream panel
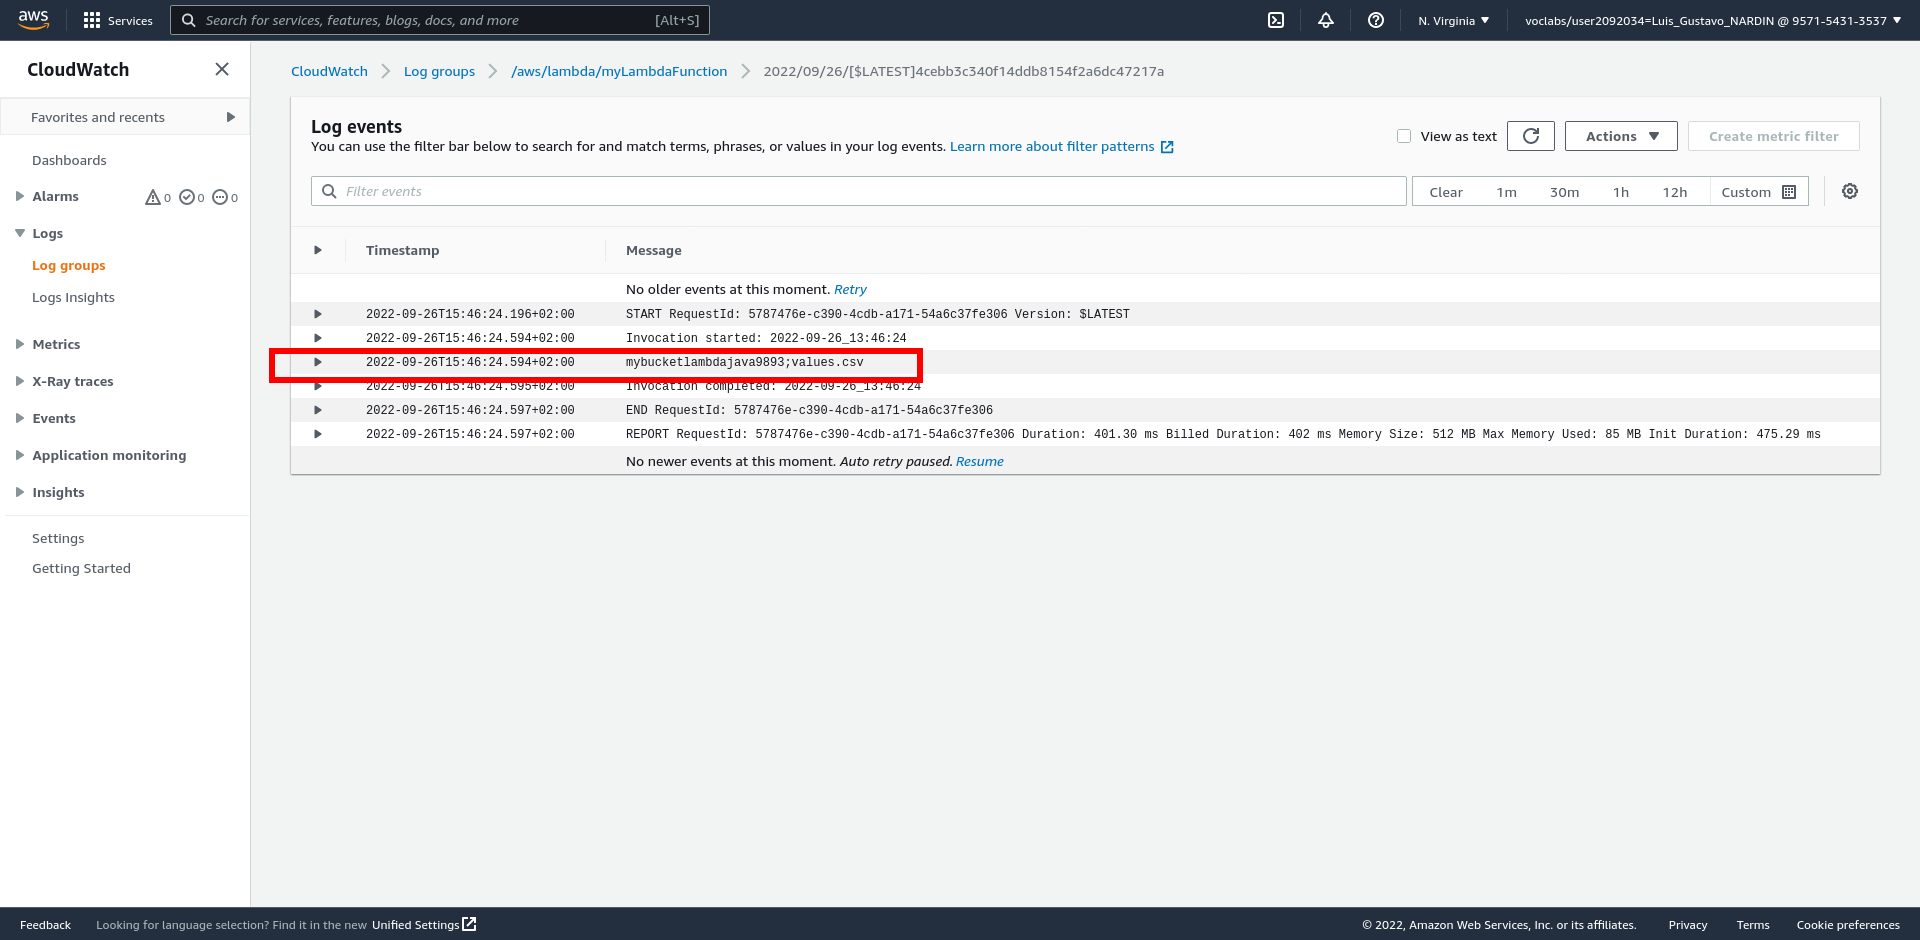
-
Something similar to these messages below will be displayed include one line with the bucket and file names you configured.
Task 2: Process the Message
Now everything is setup, so you can change the Java code to process the file from the Amazon S3 like in Step 3 of the TD 3 - Cloud Computing : AWS Lambda, Triggering Lambda Function.